
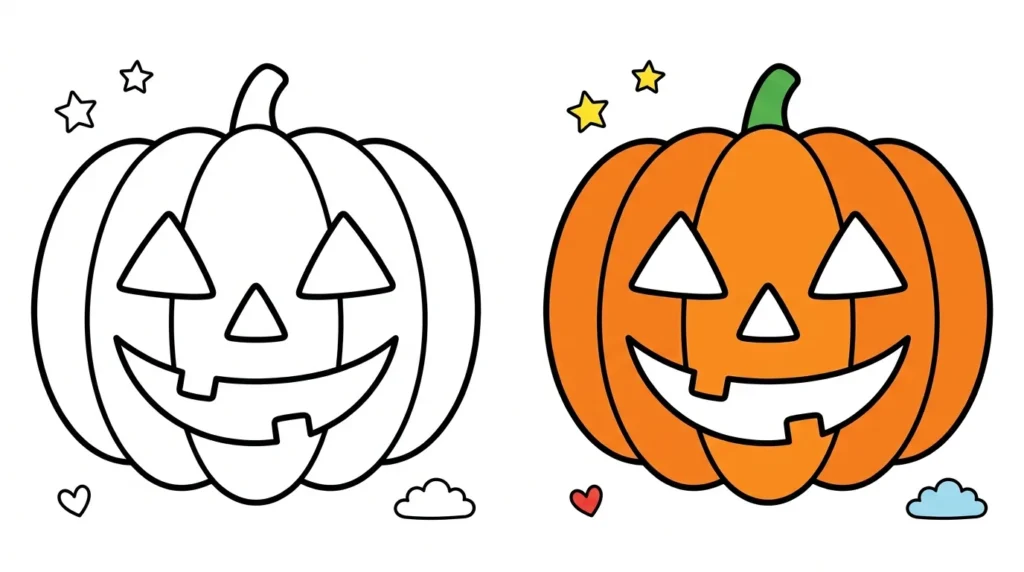
Make Halloween more exciting with a fun DIY Halloween Mask that kids can create, color, and decorate themselves. This simple pumpkin mask craft is a creative activity for home, school, or a Halloween party.
What You Will Need to Make a DIY Halloween Mask
Before starting your DIY Halloween Mask, gather a few simple craft supplies. Most of these items are easy to find at home or in a classroom.
- Paper or lightweight cardstock
- Pencil
- Scissors
- Crayons, colored pencils, or markers
- Glue
- Ruler
- Elastic string or ribbon
- Hole punch
- A printable pumpkin mask template, if available
Using thicker paper can make the finished mask stronger and easier to wear. Younger children should have an adult nearby when using scissors or other sharp tools.
DIY Halloween Mask Safety Notes for Kids
Safety is important when making and wearing a Halloween mask. Children should use child-safe scissors and have adult help when cutting difficult shapes or attaching the mask.
Make sure the eye holes are large enough for comfortable vision. The mask should never block a child’s ability to see clearly while walking or playing.
Avoid using very small decorations that could become a choking hazard for young children. Check that the elastic or ribbon is secure but not too tight around the head.
How to Make a DIY Pumpkin Halloween Mask Step by Step
Making a pumpkin mask is easy when the craft is completed one step at a time. Start by preparing your paper, drawing the basic pumpkin shape, and marking where the eyes will go.
Once the outline is ready, children can cut out the mask, decorate the pumpkin face, and add a simple way to wear it.
The best part is that children can choose their own pumpkin colors and facial expressions. They can create a traditional orange pumpkin or experiment with different colors for a unique Halloween look.
Fold the Paper to Create the Mask Shape
Start with a sheet of paper or cardstock large enough to cover the front of the child’s face. Fold the paper gently in half if you want to create a balanced pumpkin shape.
Keep the fold neat without pressing it too hard. This helps you create matching sides when drawing the mask.
Place the folded paper on a flat surface before drawing. Children can help decide how wide and tall they want their pumpkin mask to be.
Draw the Pumpkin Mask Outline
Use a pencil to draw the outside shape of the pumpkin. Create a rounded outline with several gentle curves to give the mask a classic pumpkin appearance.
Keep the shape large enough to cover the forehead and sides of the face while leaving enough room for the eyes.
You can also add small curves around the top and bottom to make the pumpkin look more playful. A simple outline works especially well for younger children because it gives them plenty of space to color.
Create the Eye Holes for Your Mask
Next, mark the positions of the eye holes. Place them evenly so the child can look through the mask comfortably.
You can draw simple oval or slightly angled shapes for the eyes. For a spooky Halloween style, try triangle-shaped eye openings.
Before cutting, check the mask against the child’s face and make sure the eye positions are correct. An adult should handle or supervise this step, especially with younger children.
Cut Out the Pumpkin Mask and Eye Holes
Carefully cut around the outside pumpkin outline using child-safe scissors. Take your time around the curves so the mask keeps its rounded pumpkin shape.
Next, carefully cut out the eye holes. Younger children should have adult assistance during this step.
After cutting, hold the mask in front of the child’s face to check the fit. Make any small adjustments needed so the eyes are comfortable and the child can see clearly.
Add the Pumpkin Face and 3D Details
Now it is time to give your DIY Halloween Mask its personality. Draw a classic pumpkin face with triangular eyes, a small nose, and a wide, spooky smile.
Children can create a happy, silly, surprised, or scary expression. Keep the shapes simple so they are easy to color.
For extra dimension, add small paper pieces for the pumpkin stem, eyebrows, cheeks, or other decorations. Glue the pieces securely and allow them to dry before wearing the mask.
Color Your DIY Halloween Mask
Coloring is one of the most enjoyable parts of making a DIY Halloween Mask. Encourage children to use orange, yellow, green, brown, or any other Halloween-inspired colors.
Crayons and colored pencils are ideal for younger children because they are easy to control. Markers can create brighter colors and bold details.
Children can also experiment with different pumpkin patterns. Try stripes, dots, zigzags, or small shapes around the mask to make each design unique.
Draw, Color, and Attach the Pumpkin Stalk
A pumpkin mask looks even more complete with a small stalk at the top. Draw a simple stem shape on a separate piece of paper or cardstock.
Color the stalk green or brown, then carefully cut it out. Add a little glue to the bottom portion and attach it to the top of the mask.
For a stronger decoration, use cardstock instead of thin paper. Let the glue dry completely before handling the mask.
Add Elastic to Make the Mask Wearable
To turn the paper craft into a wearable mask, make a small hole on each side of the pumpkin shape. A hole punch can make this step easier.
Thread a piece of elastic or ribbon through both holes and tie the ends securely. The elastic should fit comfortably around the child’s head without being too tight.
Always check the fit before wearing the mask for an extended period. The child should be able to see, breathe, and move comfortably.
DIY Halloween Mask Dot Marker Tracing and Coloring Pages
Dot marker tracing adds an easy learning activity to this Halloween craft. Children can follow dotted lines around a printable mask outline using a dot marker or washable marker.
After tracing the dotted pumpkin shape, they can color the mask using crayons, pencils, or markers. This combines tracing practice with a creative coloring activity.
Following dotted lines can help children practice hand control, visual attention, and fine motor coordination. Coloring the completed design also encourages creativity and careful use of space.
For younger children, choose large dotted outlines with plenty of room between the lines. This makes the activity easier to follow and keeps the page enjoyable.
Try More Halloween Mask Ideas for Kids
Once children finish the pumpkin design, they can create other Halloween-inspired masks using the same basic idea.
Try a friendly ghost, spooky cat, witch, monster, bat, or silly skeleton. Each design can have a different face shape, color scheme, and decoration.
You can also let children invent their own Halloween character. Creating an original mask encourages them to make decisions about shapes, colors, expressions, and decorations.
See the Finished DIY Pumpkin Halloween Mask
After all the cutting, coloring, and decorating is finished, the DIY Halloween Mask is ready to enjoy. Give the mask a final check to make sure every piece is secure.
Children can wear their handmade pumpkin masks during a Halloween craft activity, classroom celebration, or pretend-play session.
Taking a photo of the finished craft can also be a fun way to remember the activity and share the child’s creative work with family.
Tips
- Use cardstock when possible for a stronger mask.
- Let children choose their own pumpkin colors and expressions.
- Keep eye openings large enough for clear vision.
- Use child-safe scissors and supervise cutting.
- Allow glue and decorations to dry completely before wearing.
- Avoid making the elastic too tight.
- Use washable coloring supplies when working with younger children.
- Keep decorations simple and securely attached.
- Encourage children to trace slowly when using dotted outlines.
- Let kids create their own Halloween designs after finishing the pumpkin mask.
Summary
A DIY Halloween Mask is a simple and creative craft for children. With paper, coloring supplies, scissors, and a little imagination, kids can make a fun pumpkin mask for Halloween.
Adding dot marker tracing makes the activity even more engaging by combining creative coloring with fine motor practice. Whether children follow a printable design or create their own character, this Halloween craft gives them an enjoyable way to learn and express their creativity.
FAQs
Can kids make a DIY Halloween Mask at home?
Yes. Children can make a simple DIY Halloween Mask at home using paper, coloring supplies, scissors, and elastic or ribbon. Younger children should have adult supervision during cutting and assembly.
What materials do I need to make a DIY Halloween Mask?
You typically need paper or cardstock, a pencil, scissors, crayons or markers, glue, and elastic or ribbon. Optional decorations can be added for a more creative Halloween design.

Ethan Richardson is an Educational Content Editor with more than 10 years of experience reviewing and developing educational materials for young learners. His expertise includes improving worksheet accuracy, readability, and instructional quality while ensuring learning resources meet modern educational standards.